DisplayFusion 9.0 Beta 2 is now available for download! This release fixes an issue from Beta 1 where the taskbar would stay on top of full screen windows, and a couple of other minor issues.
We encourage anyone who likes to test the bleeding edge to update to this new version today to take advantage of these improvements. If you've already purchased DisplayFusion, it's a lifetime license, so you can upgrade to this version at no cost! If you would like to see a complete list of all the changes, please visit the DisplayFusion Beta Change Log.
We're very excited to announce that DisplayFusion 9.0 Beta 1 is finally available for download! This release has many fixes and improvements, but the biggest one by far is multi-DPI improvement on Windows 10. We spent a very long time working out the kinks in multi-DPI environments, and nearly all of them are resolved! The Settings, Desktop Wallpaper, and Monitor Configuration windows should now all re-scale correctly, regardless of which monitor they're on, or moved to.
We encourage anyone on a multi-DPI setup, or anyone who likes to test the bleeding edge to update to this new version today to take advantage of these improvements. If you've already purchased DisplayFusion, it's a lifetime license, so you can upgrade to this version at no cost! If you would like to see a complete list of all the changes, please visit the DisplayFusion Beta Change Log.
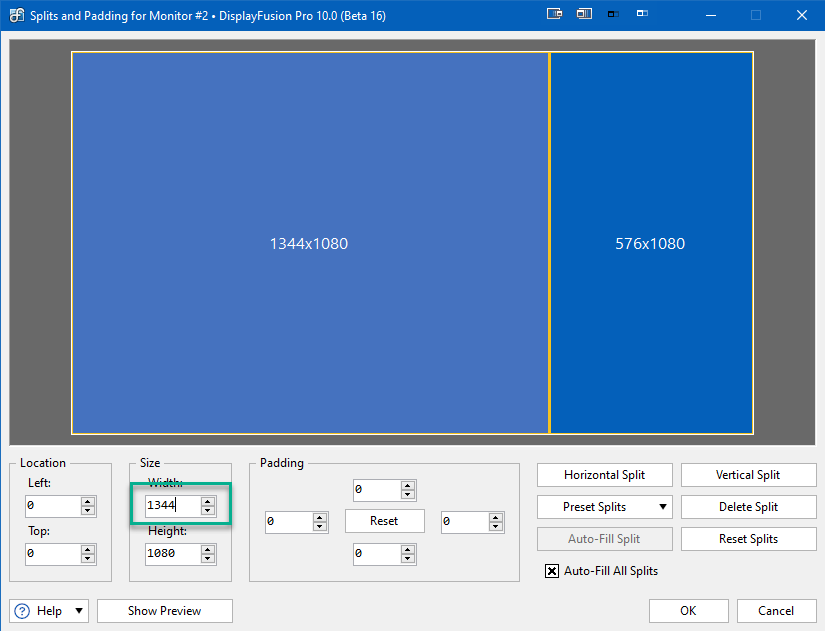
1344
We're very excited to announce that DisplayFusion 8.1.2 is now available for download! This release fixes an issue that prevented the "Astronomy Picture of the Day" wallpaper provider from loading images, and adds the ability for DisplayFusion to use TLS 1.1 and TLS 1.2 to connect to online wallpaper providers.
We encourage everyone to update to this new version today to take advantage of these improvements. If you've already purchased DisplayFusion, it's a lifetime license, so you can upgrade to this version at no cost! If you would like to see a complete list of all the changes, please visit the DisplayFusion Change Log. We'd like to send out a big thanks to the dozens of people who helped with the DisplayFusion translations, and the thousands of people that helped test the Beta versions. Thanks everyone!
Update: The sale is over, thanks everyone!
It's that time of year again! Help us celebrate the holidays and ring in the New Year with some fantastic deals on all of our software!
We're offering all of our products at a sale price of up to 50% off, until January 2nd!
If you're not familiar with all of our apps, feel free to check them out on our More Apps page.
Happy American Thanksgiving everyone! To celebrate, all of our products are on sale at up to 50% off until November 29th!
If you're not familiar with all of our apps, feel free to check them out on our More Apps page.


